Saturday 8 March 2014

Final day

I did a last minute Logo title sequence done in after effects.


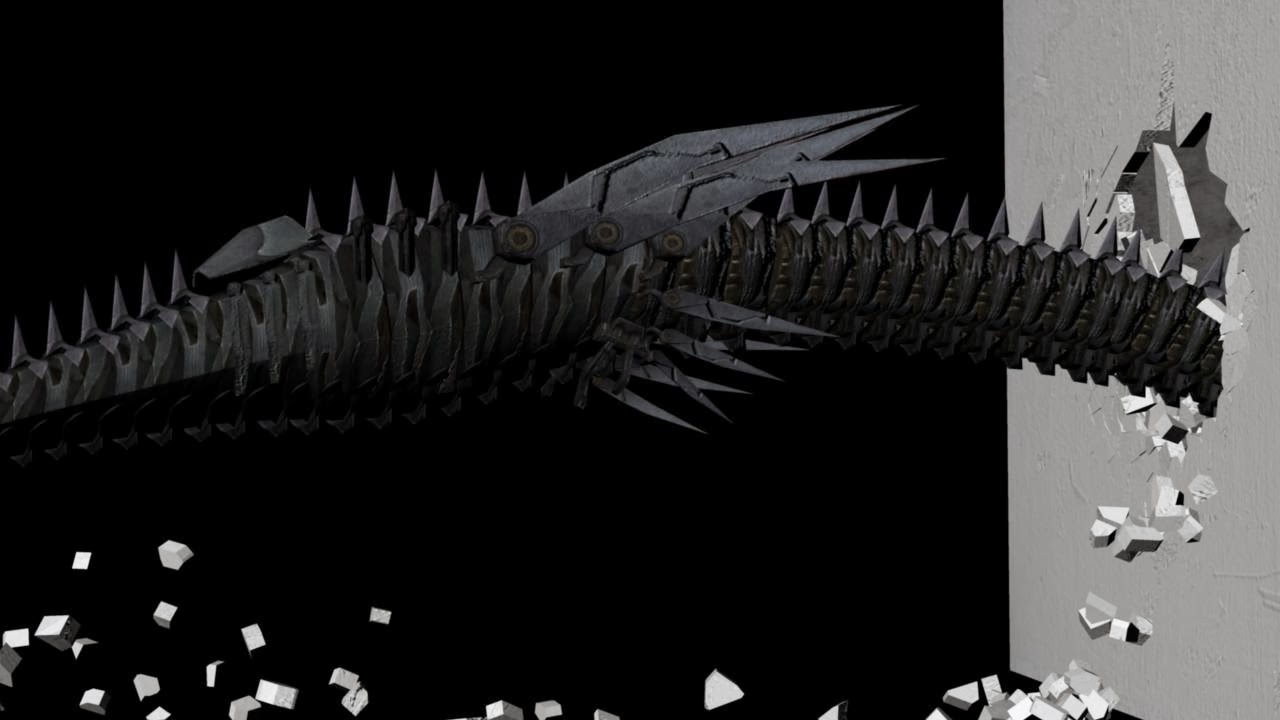
After all effects composited and color corrected, i did the final refined cut in Premiere Pro after Mr Sridhar advised us on the cutting of our short film.
Plus, with the help of my members on finding sounds, i added in the sound effects and background noises to fit into every scene and i realised it made our short film much more scarier and 'action-pack' i would say. 

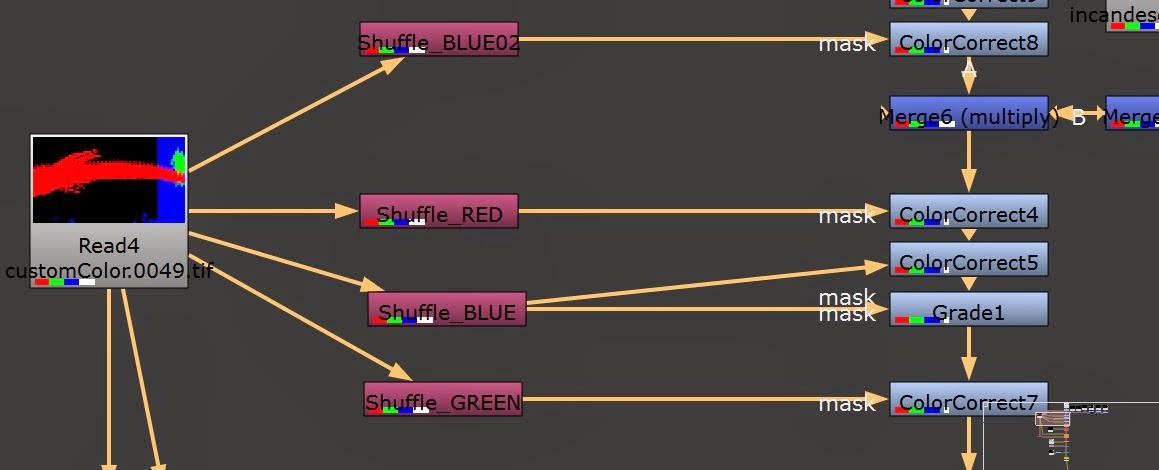
All in all, i am glad to have Mr Sridhar to be our supervisor as he guided us along well, especially guiding me in compositing in Nuke. I am surprised at how much i have improved thus far and what i am capable of doing better. I am so proud of myself and for my group members as i felt that we work as team pretty well and everything runs smoothly. My passion and drive for VFX have grown bigger and i want continue to explore more.

Thankyou,

Rahmat Zuraidi 


Thursday 6 March 2014

Post-Production : Compositing Shot2

Vfx Shot #2

Render Passes Frame 165


 Diffuse

Direct Irradiance

Indirect

AO

AO Rocks

So i did the compositing for the second vfx shot as well, once i gather all the passes into nuke, i add a color correction node to match the colors with the footage.


Post-production : Compositing Shot1

Vfx Shot #1

Render Passes Frame 030 ;


Indirect

Diffuse

Reflection

Specular

AO

So i composited them together and color correct to match to the footage.
I used custom color label so that i am able to color grade individual component without affecting other CGI elements.

Custom Color Label

So now i can use the shuffle node to color correct a certain color that i want.

Next, i added a edge blur node as the the edges are too sharp compared to the real objects in the footage.
I then added the 2D Motion Vector pass to give that nice motion blur.

With Edge blur, no 2D motionVector

With Edge blur and 2D motionVector

Lastly i composited in the a smoky debris into the scene as well.


Final

Difficulty that i had was the wall and when it cracks. I cant seem to color correct it to match the real walls in the footage. It turned out too white and overexposed instead.
The cracked wall looked too 'blocky' and not random enough.
Reference


Thursday 27 February 2014

Render Passes 01

I did test render passes for this particular frame shot.


IBL Lighting Set-up

So i brought the panorama into Photoshop and convert it to 32-bit hdr.format.
With a final gather primary scale of 2.00 instead of 1.00 the default.
I also added a directional light from where the light is coming from, to give the slight brightness.


New version of Model

So i decided to change the model as it doesn't look evil enough.
I downloaded a model from ,TF3DM.com Laser Peak ,a robotic bird from the movie Transformers.
So i change a little bit of the model, extend the model to be longer and remove the wings.


Here's the before and after

Tuesday 25 February 2014

First Cut of Lighting & Texturing

With the spherical map IBL, i applied simple mia_materials onto the model and adjust the settings.


This is my reference for the glowing eyes effect;


Re-Shoot of certain vfx shot


Panoramas for IBL, using PhotoSphere w/ my phone